Terrarium (WIP)

Terrarium

My project is to turn your collection of Blinks tiles into a digital terrarium. Each tile can provide one of a few basic building blocks (water, dirt, sunlight). Under the right conditions plants and animals will grow and live on your tiles. Not really a game, it’s more about exploration and discovery.

That’s the idea at least! I don’t think I’ll get to a point where the project is fully realized. I am encountering code and data space constraints already and I only have one system functional.

But, I wanted to share what I have now since it is kind of fun to tinker around with it.

Current State

What’s implemented? Water. That’s it. But trust me it’s kind of cool :grin:

Before starting, be aware that all tiles must be physically rotated so that face 0 is pointing up. The project has a concept of gravity, which falls from face 0 to face 3. I could add code to handle arbitrary tile rotations, but that would eat into code space even more.

Playing

Here’s how to try it. Program your tiles. Ensure they are all pointing the right direction and arrange the cluster however you’d like. At this point, all the tiles are active with the terrarium simulation, but of course nothing is happening yet!
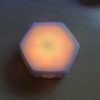
Water

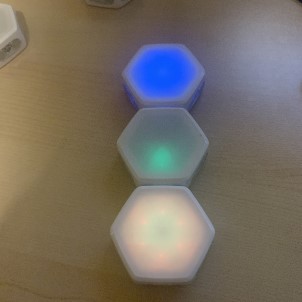
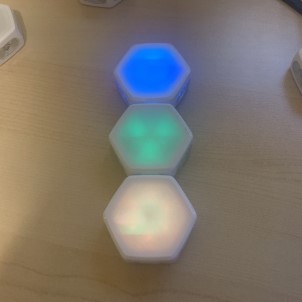
Click one of the tiles to turn it into a “dripper”. Preferably this will be a tile at the top of your collection. The top face on the tile will start to pulse. Every time it pulses it will drip water into the world. This water will fall down through empty tiles, collecting at the bottom. (The drip rate is higher than I would set in the final project, but is better for playing with alone.)

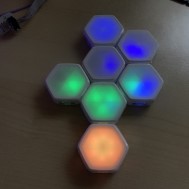
Water will fall from tile to tile, provided that there is room below. Water will also spread to the sides if it can’t fall down. Each face on the tile can hold a certain amount of water. Once it hits the maximum water level, that face will visibly change to a brighter color. That’s mostly for my debugging purposes, but I left it in for now.

As the simulation runs, you can detach tiles and reattach them anywhere in the structure and water will flow through the new connection.

To clear a tile of its water, double click it.

Future

When you load the sketch you’ll notice I’m already using a lot of data (dynamic) memory. I’m also using well over half of the code space. Every new system I add to the simulation will eat into both, which makes me very skeptical that I will be able to complete the project as desired. I just don’t have enough RAM on the tiles.

I might add a second system since I’ve already got it mostly done, but probably won’t go much further than that unless I can pull off some significant space optimization.

2 Likes

This is a pretty cool concept! The concept of slowly watching water fill up the little scene you’ve made sounds so relaxing. I’ll give it a try on my lunch break today!

Just a thought, what would happen if you set up your “dripper” tiles to where pressing the button cycled through each of the faces? Then the drip could fall through to whatever the opposite tile face is, and you don’t have to sweat having the right rotation quite as much. I’m unsure if that would eat too much into your remaining memory space though… It just might be easier than trying to keep track of face numbers, especially if they aren’t labeled like on the blanks.

I did have plans for one tile to tell its neighbor which way gravity falls (great show btw) which would totally work. However, given the limited code space, I think it would be better used to squeeze in another inhabitant of the terrarium.

Besides, it might actually be cool to have different parts of your terrarium fall in different directions!

I think one way to mitigate the code space issue is to go with asynchronous tiles, as discussed in this thread. I could make dripper tiles their own sketch separate from others, which would free up a bit of space in the non-dripper tiles to do other things.

UPDATE #1 : Dirt tiles

Before I dive into the new stuff, I should mention that I did a bit of optimizing and cruft removal. As such I remained steady at 778 bytes (75%) of dynamic memory used (same as first version).

However, code usage went from 3888 bytes (66%) to 4318 (73%). That will be a thing to watch going forward.

Dripper updated

I decided to make the user-selectable tiles take up the full tile and be their own special case. As such, when you enable a dripper in this version, you will see the entire tile pulse blue. Also, it will drip water out of all six faces. That will be nice to eventually regulate water flow, should you need more for certain situations.

ezgif.com-resize
I’m also planning ahead in case I start hitting code space limitations. I can split off these user-selectable tiles to their own sketch. Not ideal to have to program two different sketches to play around with it, but I’ll cross that bridge when it becomes necessary.

Dirt

Okay, the major addition this update is dirt tiles! Ahem. I know, they may not sound exciting, but it’s all laying the groundwork. [Edit: I’m sorry, pun not intended]

IMG_0189b
You get a dirt tile by clicking past the dripper tile. Basically, clicking tiles cycles through all the user-selectable types. There’s another one after dirt, but it doesn’t do anything yet. I left it in as a tease for what’s coming.

How do they work?

Dirt tiles absorb water that falls into them, up to a point. Rather than have a water level on each face, they just have one big reservoir. Once it becomes saturated, the tile will drip water out of its bottom three faces.

(I left in some debug coloring when they are saturated. I’ll remove that eventually.)

Future

I’m excited to start on the next system in the terrarium. I mean, I have dirt & water. Isn’t it time to make something grow?

I’ll leave you with a video of everything in action. At 0:14, the first dirt tile becomes saturated and starts seeping to the left and right. At 0:40, the second dirt tile becomes saturated and starts dripping down.

4 Likes

Thank you for sharing! This is pretty awesome!! :sweat_smile:

Update #2: Plants and Evaporation

It’s alive! Plants can now grow out of your dirt tiles, provided you keep them watered.

IMG_0220

Evaporation & Steady-state

First thing’s first, though. Before I added plants, I augmented the water system to allow for evaporation. I always wanted the terrarium to be self-sustaining. Drippers add water to the world, but nothing would make it go away. Water ended up filling all of the tiles, which wasn’t very interesting.

With evaporation, each face loses a unit of water at fixed intervals. Doing this on a per-face basis is important in order to achieve a steady-state. As water fills up more faces on more tiles, the water lost to evaporation eventually increases to match the dripper add rate.

(Evaporation also has a nice side effect of removing straggler drops of water that just lingered around before.)

Bug

While adding evaporation I found a bug in my communications protocol. It was causing some odd behavior that I had noticed earlier, but never dug into.

Turns out I was overrunning the 4-bit field when sending data between tiles. This would cause water levels to wrap around from max to zero, which looked strange, as you might imagine.

Plants :deciduous_tree:

Anyway, on to plants! Dirt tiles generate energy out of water to fuel plant growth. That energy is transmitted to any empty tiles around the dirt. After a period of time, if there is sufficient energy, a plant will start to grow, represented by the face next to the dirt turning green.

IMG_0224

As long as there is enough energy, the plant will keep growing. From the one sprout adjacent to the dirt, two more leaves will grow within the tile.

IMG_0225

If there is still excess energy, the plant will attempt to grow into the tiles that neighbor the two leaves. It will keep growing like this from tile to tile.

This can’t go forever, though, because some energy is required to maintain the plant’s current state. Eventually, the plant will reach a size where the energy given to it by the dirt is equal to the energy used to maintain its size. Again, self-sustaining!

Pruning

I wanted the removal of tiles from the plant to behave as you might expect. So when you remove a tile with a leaf, it will no longer receive energy from the root and will start to die. Leave it detached long enough and it will disappear. Reattach before it dies and it might survive.

Video

Here’s a video of the plant growth in action. The first sprout occurs at 0:21. Two leaves grow at 0:37. Once it gets to that size, I don’t think there is enough energy to support further growth. So I change the tile configuration around 0:56 so that the dirt gets more water. At that point the plant grows into the neighboring tiles (at 1:33). Again, I think this is another steady state so I change the tiles again (at 2:00) to get even more water into the system. The plant starts growing again (2:29). Finally, I change it back to the original configuration and you can see a couple leaves die off because the plant is not getting enough energy to support them. However, some of the extra leaves remain. This is because it takes more energy to grow new leaves than it does to maintain existing ones.

Larger Tile Clusters

This is where some of you (especially Move38) will have an advantage over me since I only have seven tiles to use. This project benefits from having a lot of tiles. The more you have the more interesting and varied of a terrarium you can create. I’m anxious to receive the extra tiles from the recent Kickstarter.

Code/Data Usage

The plant code is relatively complex. Code use went to 5494 bytes (93%) with debug features disabled. Data use increased a bit to 798 bytes (77%).

Getting pretty tight! I’ll do an optimization pass to try to reduce this. I’m hoping I can squeeze in one more minor system before I have to take more drastic action.

Future

We know that most plants need more than just dirt and water to grow. Time to shed some light on the simulation.

1 Like

Update #3 Sunlight

Not a super large update this time. I made the third user-selectable tile type functional. Sun tiles were there last time if you clicked past the dirt tiles, but they didn’t do anything. Now they do!

ezgif.com-resize(1)

The sun tile at the top is radiating sunlight through the other tiles connected to it. Right now it creates a path of sunlight three tiles wide in each of the six directions. I don’t have enough tiles in my possession to show this, but it should work.

The radiating glow is for my debug purposes. In the next update it will be hidden so as to not be too distracting. I do have plans to make its presence known in other ways, though.

Plant update

Now that I have sunlight, I changed how plants get their energy. Before, it was all based on water supply.

With the new algorithm, water helps a little. Just enough to grow an initial sprout, basically. After that, sunlight hitting your plant leaves will also be required to fuel further growth.

Optimizations

I did a bit of code optimization in order to fit everything. I refactored the water flow logic to trade code space for increased data usage. This ended up saving over 300 bytes of code space!

I also did some experimenting with clearing a struct by writing zeros directly to memory, rather than setting all of the struct members to zero. This saved another 300 bytes. While trying to figure out why that helped so much I realized the reason was my use of bit fields in the struct. I did this in an effort to save data footprint, but it has a tradeoff of increased code to handle the bit shifts, masks, and such. I’ll definitely be more careful when considering bit fields in the future.

What is my max data limit anyway?

Given that “Low memory available, stability problems may occur” warning I’ve been getting for a while, I got curious as to exactly how much data memory I had left before my sketch wouldn’t run.

So I added a dummy array of bytes (and some code to use it so it wouldn’t be compiled away) and gradually increased its size until my sketch started crashing.

Turns out I can get up to about 940 bytes out of 1024. That made me feel way better since I’m nowhere close to that yet.

Overuse of tile communications

Once I added the sunlight and its interaction with plants, the tile-to-tile communications became too frequent for my protocol to handle. I’m kind of curious how many comms I can safely send per second, but for now I changed how some of the comms were used in order to reduce their frequency.

Code/Data Usage

I’m at 5754 (97%) code space used, and 844 (82%) data space. I’m definitely going to need more optimizations to add anything else.

I think it’s time to go asymmetric and split the dripper/dirt/sun tiles into their own sketch. That will knock over 1k of code space from the normal tile’s sketch, which will let me add another feature or two.

Future

I think this next round will involve some cleanup, refactoring, and optimization in order to prepare for the future.

I also want to change how the tiles are rendered (funny word to use when there’s only six pixels on a tile). It’d be cool to make things hit by sunlight actually get brighter.

2 Likes

Really enjoying this build! The idea of the sunlight effect only being visible because of it reflecting off of surfaces could be a really nice touch. There is something about seeing it emanating after spawn that is nice, i.e. a little teaser or kind of like the moment you see the sun and it creates a sort of lens flare… Btw, I think going the route of asymmetric is the way to go, but I should note that @bigjosh recently added a space hack to our dev branch. The hack is only really useful for dev cycles, as it creates a sterile Blink, but offers up that space for use in a crunch :).

1 Like

So I added a dummy array of bytes (and some code to use it so it wouldn’t be compiled away) and gradually increased its size until my sketch started crashing.

How did it crash? Hopefully with a “stack overflow” error code (4 red blinks)?

1 Like

Hey thanks for checking it out @jbobrow. I was kind of assuming, given the hoops one needs to jump through to play around with it, that this project was just for me :smiley:

Having the sunlight pulse every so often might be a nice effect, but certainly not as often as it does now.

BTW, once I go asymmetric and have more code space, I plan to try to tackle the whole “tiles must be oriented the right way” thing. It’s a super annoying restriction that just isn’t good UX.

How did it crash? Hopefully with a “stack overflow” error code (4 red blinks)?

Yes exactly right. Thankfully it started blinking red as soon as it was done programming, which made for quick iterations while I was narrowing down the limit. Of course there’s a chance that some other, less used code path might overrun the stack more easily, but I think I’ll be fine as long as I stay far away from the limit I found empirically.

1 Like

Good to know that the stack check code works!

LMK if you want a second set of eyes to try and free up some data space. There are often low hanging fruit.

Update #4: Gravity tiles

I made the switch to asymmetric tiles in order to split the code base between normal tiles and special tiles. This brought relief of code space for both kinds. There’s a lot of shared code between them so it wasn’t super drastic, but it did free up enough space that I should be good for a few more updates.

Gravity & arbitrary tile orientation

The first thing I wanted to do with the extra code space was remove the major UX annoyance that has been in the project from the start. Namely that all tiles had to be oriented with face 0 pointing up in order for gravity to function properly.

To fix this, I created a new special tile role: Gravity tiles. There were lots of ways to possibly address the issue, and having a dedicated tile indicating gravity direction was the cleanest I could find. There will be issues if you have multiple gravity tiles within the same cluster if they point in different directions, but hopefully that isn’t too hard to avoid.

Gravity tiles let you select which face is “up” within the simulation. The tiles then broadcast this to the rest of the cluster. The other tiles use this to adjust their understanding for gravity. And boom, water falls correctly no mater how the tiles are rotated! :partying_face:

Here’s a video of a gravity tile in action. At the beginning when I introduce the dripper, water flows down as it normally did from face 0 to 3. Then I introduce the gravity tile. The lit face points to the logical “up” direction. Clicking the gravity tile changes which way is up, and you can see the water within the tiles react accordingly.

Right now, the gravity tile only broadcasts the gravity direction every five seconds. This leads to a delay between when you click to change the direction and when you actually see the water change. I’ll fix that eventually.

(I also seem to have broken evaporation. Need to fix that too.)

Playing

Playing with this build will require a few extra hoops to jump through. You’ll need to change a couple #define statements in the source to switch between the two parts of the code.

  • Set INCLUDE_BASE_TILES to 0 and INCLUDE_SPECIAL_TILES to 1
  • Program your tile and then share it with four other tiles
  • Swap the defines so base tiles is 1 and special tiles is 0
  • Program your tile and then share it with all your other tiles
  • If you have a lot of tiles, feel free to create more than four special tiles, but you’ll want at least four so you can have one of each type

The special tiles default to dirt. Double click them until you have one each dirt, sun, dripper, and gravity tile. Then you can play around.

Interaction

I changed how clicks work in order to add more interactivity in your Terrarium. Now, you must double click a special tile in order to change its role (dripper → dirt → sun → gravity).

Single clicking a tile will now interact with it. Right now, it only works with drippers, sun tiles, and gravity tiles. With drippers and sun, clicking will cycle through three speeds of dripping or sun strength. Useful if you need more water/sun in certain situations. Clicking a gravity tile changes gravity direction.

Resetting a tile, which used to be a double click, is now done with a triple click.

Code/Data Usage

Base tile code usage dropped to 4752 bytes (80%) and data dropped to 804 bytes (78%).

Special tile code is at 5488 bytes (93%) while data is at 819 bytes (79%).

Special tiles took a hit mostly due to the new gravity tile type, and allowing drippers and suns to have different rates. Hopefully this won’t increase much any more as the special tiles won’t change a lot other than bugs and polish.

Future

I’m going to add more interactivity in the simulation. For instance, maybe plants won’t grow beyond the initial bud until you click them. That will give you more control on where plants grow. As I introduce other elements to the simulation, I’ll use the occasional click to connect with the player and make them feel like they have more agency in what’s happening.

There’s also a couple enhancements I want to add to plants now that I have more code space.

2 Likes

Update #5: Bugs! (the flying kind)

I actually had a bug flying around within a tile shortly after I started the project weeks ago. Sort of a proof of concept. Once I switched to “official” production mode I removed that code while I finalized the communications code and water & plant systems.

But now’s the time to bring it back!

bug

Once spawned, bugs will fly around between tiles.

Here’s a more fully-formed terrarium with a bug having fun.

bug2

These tiles are really difficult to photograph. Maybe a DSLR would work better - I don’t know. The colors just bleed into one another too much in video.

Plant branches

Plants used to be all green as they grew. I made it so when a new leaf grows, the thing it attaches to changes color to look closer to a proper branch.

Plant flowers

I’m also trying to work flowers into the plants. Right now they only grow under certain conditions that are pretty difficult to set up, but let me know if you manage it.

If you do manage to blossom a flower, a bug will spawn. It’s a kind of game-ified progression system to give you something to do and strive for. I would have put tons of those kinds of things in if the code space gods were more generous.

For now, though, since it’s still a work in progress, you can triple-click any tile to spawn a bug there.

Dripper = Gravity

I didn’t like having a fourth type of special tile to handle gravity. Since most folks only have six tiles to begin with, that takes away too many from actually building your terrarium.

I merged the gravity tile functionality into the dripper. It kind of makes sense anyway - gravity mostly only affects water.

To communicate the direction of gravity, I changed how the dripper looks. It will now kind of flow down within the tile. If you want to change gravity direction, you need to physically rotate the tile. Clicking will only affect the dripper speed.

Render experimentation

I experimented with a new renderer that is a bit more sophisticated, but it ended up taking too much code space that I couldn’t afford. I did manage to add code to brighten tiles that are in the path of sunlight. So at least there’s that.

Profiling

I profiled my main loop to see how long it takes. I used the tile faces to display, in binary, the time difference between millis() calls in successive “frames”. Turns out to be between 31-48 ms, which is honestly in line with what I was hoping.

I was worried that when transferring the bug from tile to tile, it would briefly show up on both due to the communications delay. That doesn’t seem to be a problem though. Whew!

Learnings

I had some code to set a timer in several places. I consolidated that into a helper function and called that instead. Turned out to save a significant chunk of code space. Lesson learned there!

Future

Code space is pretty much full for both sketch types (special tiles and normal tiles). I don’t want this to be the end of the project so I’m going to try to eke out enough space for one more update. Optimization ahoy!

9 Likes

Sorry for the lack of updates. I haven’t found any decent sized optimizations to save code space. In fact, some of the experiments I attempted increased code usage, which baffled me. I can only assume that there’s some compiler optimizations going on affecting things. I wouldn’t know for sure without looking at the resulting assembly code, and I’m not ready to do that yet.

I’ve been distracted by other things at home, too. That should ease up in a couple weeks so I can focus more on this.

4 Likes